
|
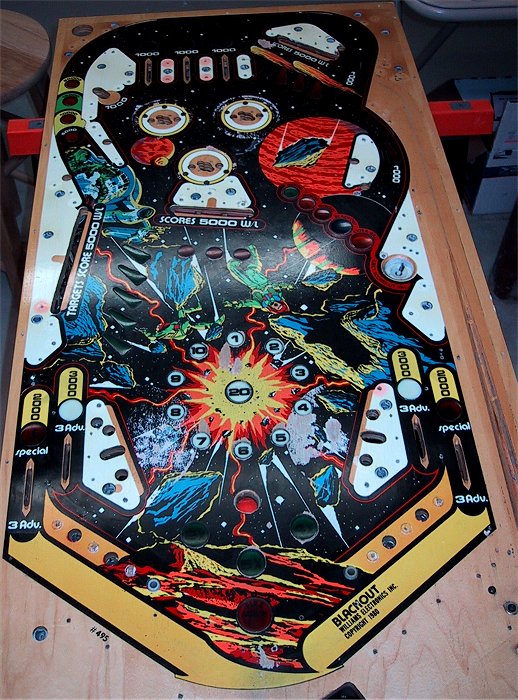
Game Restoration - Part 2 January 27, 2002 - Playfield Restoration This was supposed to be the easy and fun part. I finished stripping down the playfield by removing absolutely everything from the top of the playfield (see below). All of the metal parts were dumped into the tumbler and cleaned. I checked all of the playfield parts to see what looked marginal and needed to be replaced, then placed the order with Pinball Resource. You may notice in the photo below that there is an extreme amount of wear around the slings. The Mylar had been added around the sling shots after the playfield had already been worn down to the wood. In order to repair the worn areas, the Mylar had to come off. If you've read my Mylar Removal page, then you know that I recommend using "Goo-Gone" to remove Mylar. However, I had been reading on rec.games.pinball about a method of removing Mylar that utilizes "freeze spray". Freeze spray is commonly used to cool components on a circuit board to find heat faulty parts. I needed to purchase a can for this reason anyway, so I bought two cans and figured I'd give it a shot! |
 |
|
Well, as you can tell from the photo, I didn't turn out as I had expected! I need to remove all of the Mylar, including the pop bumper rings. I first sprayed it on the left sling and the Mylar just about jumped off the playfield, with all of the paint!! I didn't do any pulling, I sprayed and it just slide right off, paint and all... Thinking this was a fluke, I did the right sling. Froze the thing and nothing happened. OK, I tried lifting one edge of the Mylar and sprayed again. Nothing. It was like I hadn't done a thing. OK, I'll move up to the pop bumpers. Once again, did the first ring and it just about slide off on its own, again with a good deal of paint. Yikes, what's going on here? Tried a second pop bumper and it didn't budge, same with the third. So here I am with two pieces removed with most of the paint and three still clinging like I didn't do anything. I just about emptied the can on the remaining pieces and still nothing budged. I resorted to my tried and true method of using Goo-Gone and then came off as expected, still with more paint that I would have liked. |
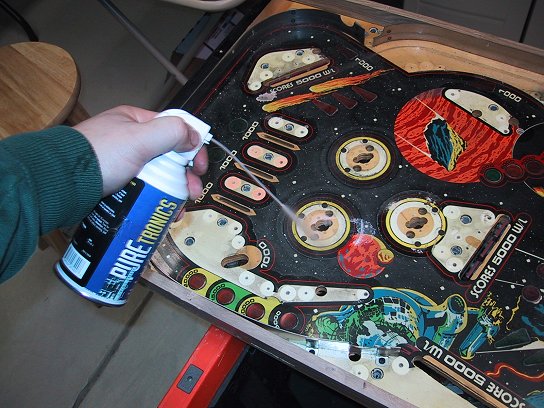 Using the freeze spray to attempt to remove the Mylar pop bumper ring. This one didn't budge! |
|
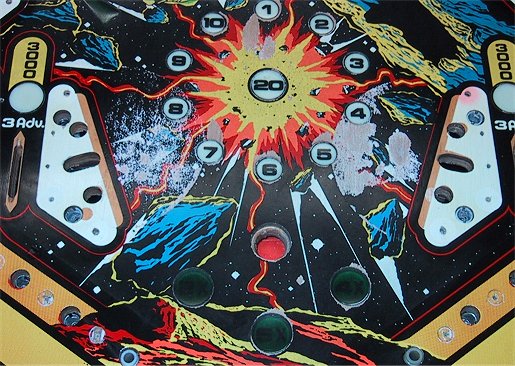
The photo below shows the disaster area that was left behind by my freeze spray Mylar removal attempts. The playfield has gone from slightly worn to almost ruined. What was supposed to be some touch up around the inserts is going to require some major work. |
 |
|
This shot shows my "first" attempt at repairing the damage left behind by the Mylar removal. The right sling turned out OK, but my attempt at painting the rock on the left shows my absolute lack of any artistic talent! It also doesn't show up in the picture, but the surface has too many brush strokes, even for an area that will be under Mylar again. I've since removed the "repair" job on the right and have sanded the area down. My plan is to repaint the area black using a paint thinned with acrylic gloss medium, applying several coats and sanding in between. I'll also try using a foam brush to try to eliminate the brush strokes. Then rather than paint on my pathetic rock again, I'm thinking I'll attempt to recreate the rock on the computer and create a decal and apply that. Stay tuned to see how it turns out! |
|
Go
to Part 3 of the Restoration! |
|
Back to Mark's Pinball Page!
It is currently 8:12:44 AM (Eastern) on Saturday, July 18, 2026 |
